Cutting PVC roof panels can seem daunting at first, but with the right tools and techniques, you can tackle the job with confidence. Whether you’re a seasoned pro or just looking to do a DIY project, knowing how to cut PVC roof panels properly is essential for achieving clean, precise results. In this guide, we’ll walk you through the necessary tools, preparation steps, cutting techniques, and safety measures to ensure you get the job done right. Learn the essential steps and safety tips for accurately cutting PVC roof panels for DIY projects and professional installations.
Key Takeaways
- Gather all essential tools before starting, including measuring and cutting equipment.
- Always measure and mark your cuts accurately to avoid mistakes.
- Choose the right cutting method based on the complexity of the cut.
- Wear protective gear to keep yourself safe while working.
- Take your time and avoid rushing to ensure clean, precise cuts.
Essential Tools For Cutting PVC Roof
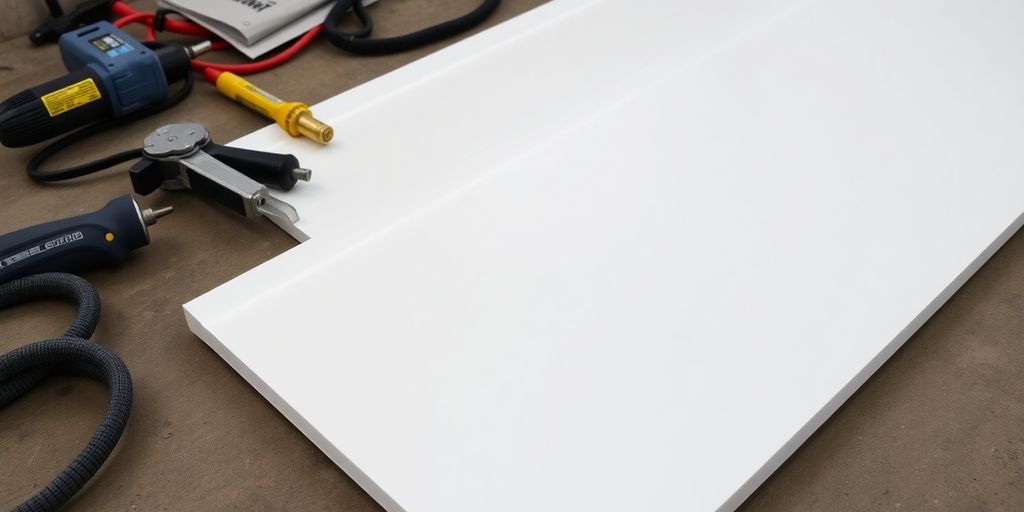
Cutting PVC roof panels requires having the right tools on hand to ensure accuracy, safety, and a clean finish. Using the correct tools not only makes the job easier but also minimizes the risk of damaging the panels or causing injury. Let’s explore the essential tools you’ll need.
Measuring Tools
Accurate measurements are the foundation of any successful cutting project. Without precise measurements, you risk cutting panels too short or at the wrong angle, leading to wasted material and a less-than-perfect roof. Here’s what you’ll need:
- Tape Measure: A standard tape measure is essential for determining the overall dimensions of the panels and the specific cuts you need to make. Look for one with clear markings and a locking mechanism to hold the measurement in place.
- Straight Edge: A long, rigid straight edge, such as a metal ruler or level, is crucial for drawing straight cutting lines on the PVC panels. This ensures that your cuts are accurate and consistent.
- Felt-tipped Pen: Use a felt-tipped pen or marker to clearly mark the cutting lines on the PVC. Avoid using permanent markers, as they can be difficult to remove if you make a mistake. A pen for marking is ideal.
Cutting Tools
The choice of cutting tool depends on the thickness of the PVC panels and the type of cuts you need to make. Here are some common options:
- Utility Knife: A utility knife with a sharp blade is suitable for thin PVC panels. It’s best used for scoring the panel multiple times along the cutting line until you can snap it cleanly. Always use a fresh blade for the best results.
- Circular Saw: A circular saw with a fine-tooth blade is ideal for cutting thicker PVC panels. A carbide-tipped blade is recommended for its durability and ability to produce clean cuts. Make sure to use the correct blade for the job.
- PVC Cutter: A specialized PVC cutter, similar to a pipe cutter, can be used for making clean, perpendicular cuts on PVC panels. This tool is particularly useful for creating precise edges and corners.
Safety Equipment
Safety should always be a top priority when cutting PVC roof panels. Here’s the protective gear you’ll need:
- Safety Glasses: Protect your eyes from flying debris by wearing safety glasses or goggles. PVC shards can be sharp and cause serious eye injuries.
- Gloves: Wear work gloves to protect your hands from cuts and abrasions. Gloves also provide a better grip on the tools and panels.
- Dust Mask: Cutting PVC can create dust particles that can irritate your lungs. Wear a dust mask or respirator to prevent inhaling these particles. It’s important to wear protective gear at all times.
A well-prepared workspace and the right safety equipment are just as important as the cutting tools themselves. Taking the time to gather these essentials will ensure a smoother, safer, and more accurate cutting process. Remember to always prioritize safety and double-check your measurements before making any cuts.
Preparing To Cut PVC Roof Panels
Measuring and Marking
Before you even think about making a cut, accurate measurements are key. Take your time to measure the area where the PVC panel will be installed, and then transfer those measurements onto the panel itself. Use a reliable tape measure and a marker that’s easily visible on the PVC surface. Double-check your measurements – it’s way easier to erase a line than to fix a panel that’s too short. I usually mark the cutting line with a fine-tipped marker, making sure it’s clear and easy to follow. This step is crucial for avoiding costly mistakes and ensuring a professional-looking result. Don’t skip it!
Securing the Panel
Once you’ve got your measurements marked, you need to make sure the panel is stable while you’re cutting. A wobbly panel can lead to jagged cuts and potential injuries. Here’s what I do:
- Use clamps to secure the panel to a sturdy workbench. This prevents movement and ensures a clean cut.
- If you don’t have clamps, you can use weights to hold the panel in place. Just make sure they’re heavy enough to prevent slippage.
- For larger panels, consider using sawhorses to provide additional support. This will help prevent the panel from flexing or bending during the cutting process.
Securing the panel properly is not just about getting a clean cut; it’s also about safety. A stable panel reduces the risk of the cutting tool slipping and causing injury. Always prioritize stability before starting to cut.
Choosing the Right Cutting Method
Selecting the right cutting method depends on the thickness of the PVC panel and the type of cut you need to make. For thin panels, a utility knife might be sufficient, but for thicker panels, you’ll likely need a circular saw. Here’s a quick rundown:
- Utility Knife: Best for thin panels and simple straight cuts. Requires multiple passes for a clean cut.
- Circular Saw: Ideal for thicker panels and more complex cuts. Use a fine-tooth blade designed for plastics.
- Jigsaw: Good for curved cuts and intricate shapes. Use a blade designed for plastics and go slow to avoid melting.
Consider the advantages and disadvantages of each method before making your choice. A little planning can save you a lot of headaches later on.
Techniques For Cutting PVC Roof Panels
Using a Utility Knife
Okay, so you wanna use a utility knife? It’s not too bad. First, you score the PVC panel along your marked line. You really need to use firm, even pressure. Don’t be shy, but don’t go crazy either. Then, and this is key, repeat the scoring. Do it multiple times. Each pass should get a little deeper. Eventually, you should be able to carefully bend the panel along the scored line, and it should snap. If there are any bits still connected, just use the utility knife to trim them off. It’s all about gradual scoring, not trying to cut through in one go.
Using a Circular Saw
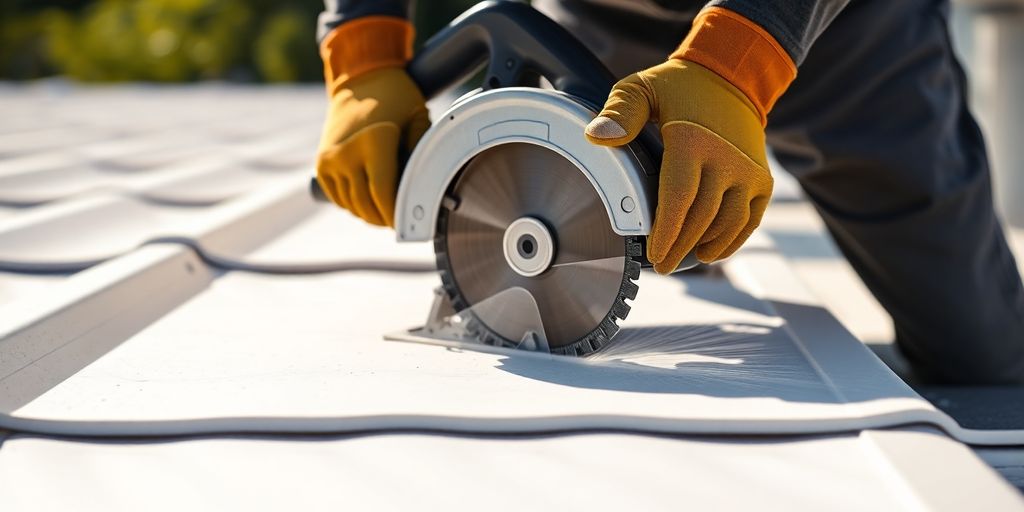
Using a circular saw is pretty straightforward. You’ll want to adjust the blade depth so it matches the thickness of your PVC panel. Don’t want it sticking out too much. Then, line up the blade with your cutting line and carefully start cutting. Keep a steady hand and a controlled motion. A tip is to use a straight edge as a guide. It’ll help you keep the cut straight. I find that going slow and steady is better than rushing it.
Cutting Small Shapes
Cutting small shapes can be a bit tricky, but it’s doable. For intricate cuts, tin snips can be your best friend. They’re great for trimming around things like downpipes. Just make sure you’re cutting on the center of the trough if you’re working with corrugated sheets, so the flashing locks in properly.
When cutting PVC roof panels, remember that patience is key. Rushing the process can lead to mistakes and uneven cuts. Take your time, follow the marked lines carefully, and use the appropriate tools for the job. This will help you achieve clean, professional-looking results.
Safety Precautions When Cutting PVC Roof
Cutting PVC roof panels can be a breeze, but let’s not forget the importance of safety. It’s easy to get caught up in the project and overlook some basic precautions, but trust me, a little planning goes a long way. I’ve learned the hard way that a few minutes of prep can save you from a trip to the ER. So, before you even think about picking up that saw, let’s talk safety.
Wearing Protective Gear
First things first: gear up! This isn’t a suggestion; it’s a must. I always make sure I’ve got my safety glasses on. You don’t want bits of PVC flying into your eyes. Gloves are also a good idea to protect your hands from sharp edges and splinters. And don’t forget a dust mask or respirator. PVC dust isn’t something you want to be breathing in all day. Think of it like this: dress for the job, and the job will be less likely to dress you in bandages.
Setting Up a Safe Workspace
Your workspace is key. Clear out any clutter, make sure you have plenty of room to move around, and ensure your work surface is stable. I like to use a sturdy workbench that won’t wobble while I’m cutting. Good lighting is also important. You need to see what you’re doing! And keep distractions to a minimum. Now is not the time to multitask or have the kids running around. A focused workspace is a safe workspace.
Handling Tools Safely
Okay, now for the tools. Make sure you know how to use them properly before you start cutting. Read the instructions, watch some videos, whatever it takes. And always, always use the right tool for the job. Don’t try to force something that isn’t meant to be used in a certain way. Keep your tools in good condition. Sharp blades are safer than dull ones because they require less force. And never, ever put your hands in the path of the blade. That should be obvious, but it’s worth repeating. When you’re done cutting, unplug your power tools and store them safely away from kids and pets.
Remember, safety isn’t just a set of rules; it’s a mindset. Take your time, be aware of your surroundings, and don’t be afraid to stop and reassess if something doesn’t feel right. A little caution can prevent a lot of pain and frustration.
Finishing Touches After Cutting PVC Roof
Inspecting Edges
After you’ve made your cuts, it’s super important to give the edges a good once-over. Look for any rough spots, unevenness, or jagged bits. These imperfections can not only look bad but also compromise the integrity of the installation, especially when it comes to weatherproofing. Run your hand carefully along the cut to feel for anything that needs attention. This step is crucial for ensuring a professional and long-lasting result. You might need to refine your cutting technique if you notice recurring issues.
Smoothing Rough Areas
Okay, so you’ve found some rough spots? No biggie! Grab some sandpaper – a medium-grit followed by a fine-grit usually does the trick. Gently sand down those edges until they’re smooth to the touch. For bigger imperfections, a utility knife can help to carefully trim away excess material before sanding. Take your time with this step; rushing can lead to more unevenness or even damage the panel. The goal is to create a clean, smooth edge that blends seamlessly with the rest of the roof. This is where you can use ASA PVC roof panels to ensure a smooth finish.
Cleaning Up
Once you’re happy with the smoothness of the edges, it’s time to clean up. This means getting rid of any PVC dust or debris left over from the cutting and sanding process. A simple wipe-down with a damp cloth usually does the trick. For more stubborn dust, you might need to use a mild cleaner. Make sure the panels are completely dry before you start installing them. A clean surface will also help with adhesion if you’re using any sealants or adhesives during installation. Plus, a clean workspace is just a safer workspace, right?
Cleaning up after cutting PVC roof panels is more than just tidiness; it’s about ensuring the longevity and performance of your roofing. Removing debris prevents potential issues like trapped moisture or uneven sealing, which can lead to premature wear and tear. A clean surface allows for better adhesion of any protective coatings or sealants, ultimately contributing to a more durable and weather-resistant roof.
Here’s a quick checklist for cleaning up:
- Wipe down all cut edges with a damp cloth.
- Sweep or vacuum the work area to remove PVC dust.
- Dispose of any scrap pieces properly.
Common Mistakes To Avoid When Cutting PVC Roof
Rushing the Cutting Process
One of the biggest mistakes people make is trying to rush the cutting process. PVC, while relatively easy to work with, requires patience. Haste can lead to inaccurate cuts, jagged edges, and even damage to the panel itself. Take your time to measure accurately, secure the panel properly, and cut slowly and steadily. Remember, it’s better to spend a little extra time and get it right than to have to redo the entire cut.
Neglecting Safety Measures
Safety should always be a top priority when working with power tools. It’s easy to get complacent, especially if you’re experienced, but neglecting safety measures can lead to serious injuries. Always wear appropriate protective gear, such as safety glasses and gloves. Make sure your workspace is well-lit and free of obstructions. And never operate power tools when you’re tired or distracted. It’s just not worth the risk. Always remember to follow safety guidelines to prevent accidents.
Using Incorrect Tools
Using the wrong tools for the job is another common mistake. While a utility knife can work for thin PVC, it’s not ideal for thicker panels. Similarly, using a dull blade on a circular saw can cause the PVC to crack or splinter. Make sure you’re using the right tool for the thickness and type of PVC you’re cutting. A sharp blade designed for plastics will give you the cleanest, most accurate cuts. For example, using a carbide tipped blade on budget PVC can cause it to break. Consider the best clear corrugated plastic sheet for your project.
It’s important to remember that cutting PVC roof panels is not a race. Taking your time, using the right tools, and prioritizing safety will help you achieve clean, accurate cuts and avoid costly mistakes.
Tips For Achieving Clean Cuts On PVC Roof
Maintaining a Steady Hand
To get those super clean cuts on your PVC roof panels, it’s all about keeping a steady hand. Seriously, this makes a huge difference. Any wobble or jerky movement can lead to jagged edges, and nobody wants that. Practice your cutting motion before you even turn on the saw. Think of it like you’re tracing a line, nice and smooth. It might sound simple, but it’s key to a professional-looking job.
Using a Straight Edge
Don’t even think about freehanding it unless you’re some kind of PVC-cutting wizard. A straight edge is your best friend here. Clamp down a good quality straight edge – a metal ruler or even a piece of wood will do – right along your cutting line. This acts as a guide for your blade, ensuring a straight, clean cut every time. It’s a simple step, but it prevents a lot of headaches down the road. Think of it as the training wheels for cutting PVC. For cutting polycarbonate, utilize a fine-toothed blade to achieve a smooth edge.
Cutting at the Right Speed
Speed matters when you’re slicing through PVC. Go too fast, and you risk melting the plastic or creating rough edges. Go too slow, and the blade might bind or wander off course. The sweet spot is somewhere in the middle – a moderate, controlled pace. Let the blade do the work, and don’t force it. Listen to the sound of the saw and adjust your speed accordingly. It’s a bit of a feel thing, but you’ll get the hang of it with a little practice.
Cutting PVC roof panels isn’t rocket science, but it does require a bit of finesse. Take your time, focus on accuracy, and don’t be afraid to experiment with different techniques until you find what works best for you. Remember, a little patience goes a long way in achieving those clean, professional-looking cuts.
Wrapping It Up
Cutting PVC roof panels isn’t as tough as it might seem. With the right tools and a bit of planning, you can get it done without too much hassle. Just remember to take your time, measure twice, and keep safety in mind. Once you’ve got your panels cut, you’ll be ready to tackle your roofing project with confidence. So, roll up your sleeves, grab those tools, and get to work. You’ve got this!
Frequently Asked Questions
What tools do I need to cut PVC roof panels?
To cut PVC roof panels, you will need a measuring tape, a straight edge, a utility knife or circular saw, and safety gear like gloves and goggles.
How do I measure and mark the PVC panels before cutting?
Use a measuring tape to find the length you need, then mark the cutting line on both sides of the panel with a permanent marker.
What is the best way to secure the panel while cutting?
Place the panel on a stable surface and use clamps or weights to hold it in place. This will help prevent movement during cutting.
Can I cut PVC panels with a utility knife?
Yes, you can use a utility knife. Score along the marked line multiple times, then bend the panel to snap it along the scored line.
What safety precautions should I take when cutting PVC roofing?
Always wear protective gear like gloves and goggles, work in a safe area, and handle tools carefully to avoid injuries.
How can I achieve clean cuts on PVC roof panels?
Maintain a steady hand, use a straight edge to guide your cuts, and don’t rush the cutting process to ensure clean edges.